Spend 1%–5% Per Card: Store Trading Cards by Value, Collectors
By Ripbin Research · Published 2026-09-06
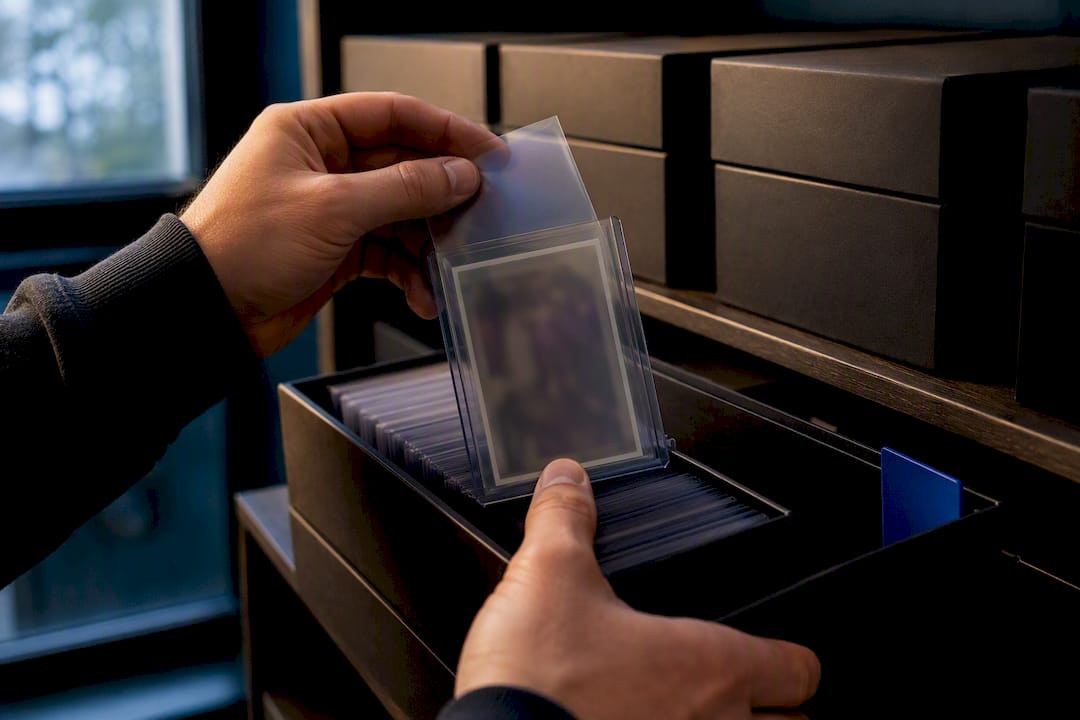
Spend 1%–5% Per Card: Store Trading Cards by Value, Collectors
The best way to store trading cards is a four-step stack: a soft inner sleeve, a rigid outer holder, then a fitted box or zippered binder, all kept in a room that holds steady between 65°F and 75°F with 40% to 55% relative humidity. Match the toughness of that stack to the card’s value: penny sleeves for commons, toploaders for mid-tier cards, and grading submission for higher-value cards where costs are justified. Buy a $10 hygrometer before you buy another sleeve. It tells you more about your collection’s future than anything else on this list.
TL;DR:
- Protect high-value cards with double sleeves, semi-rigid holders, and store them in climate-controlled environments to prevent warping and surface damage.
- Use a hygrometer to monitor room humidity and temperature, maintaining a range of 65°F to 75°F and 40% to 55% relative humidity for long-term preservation.
- Allocate protection spending based on current market value, spending between 1% and 5% of a card’s value, with higher protection for cards over $50.
- Avoid using improper packaging during shipping, such as skipping the cardboard sandwich or forcing cards into undersized holders, which can cause damage.
- Regularly update your collection’s value and protection tiers using live market data to ensure protection efforts match current card worth.
Table of Contents
- How Do You Store Trading Cards to Protect Their Value?
- Which Sleeves and Holders Protect Cards Best?
- What’s the Best Way to Store a Full Collection?
- What Temperature and Humidity Keep Cards From Warping?
- How Much Should You Spend Protecting Each Card?
- What Do Grading Companies Actually Require Before Submission?
- How Do You Ship Cards Without Damaging Them?
- How Can You Use Market Data to Decide What to Protect First?
- Why the Standard Storage Advice Sells Collectors Short
- Scan, Value, and Protect the Cards That Matter Most
- Sources
How Do You Store Trading Cards to Protect Their Value?
Every well-protected collection follows the same basic architecture, whether it belongs to a kid with a shoebox of commons or a serious investor with six figures in graded slabs. The card touches a soft sleeve first, that sleeve sits inside something rigid, and the rigid piece lives inside a container built to keep dust, light, and pressure away. The final layer, easy to overlook, is the room itself: its temperature and humidity decide whether everything above holds up over years instead of months.
Collectors tend to overthink the fancy holder and underthink the basics. A layered protection system, meaning soft sleeve, rigid holder, and an outer box or binder, covers the vast majority of storage needs without requiring a single expensive purchase. The mistakes that actually destroy cards are almost always about skipping a layer, using the wrong material, or ignoring the room’s climate entirely. The sections below walk through each layer, plus the value math that tells you where to stop spending and where to spend more.
Which Sleeves and Holders Protect Cards Best?
Start with the cheapest, thinnest layer: the penny sleeve. It’s a loose polypropylene sleeve that costs a fraction of a cent per card and exists mainly to stop surface scuffing from dust and finger contact. It does nothing against bending. For anything you actually care about, a penny sleeve is step one, not the whole plan.
A perfect-fit or “fitted” inner sleeve is the tighter, more precise cousin. It hugs the card closely enough to stop it from sliding around inside a toploader, which matters more than it sounds. A card rattling loose inside a rigid holder picks up corner dings from the inside, not the outside. Look for polypropylene or polyethylene construction, and avoid anything made from PVC. PVC sleeves off-gas over time and leave a sticky residue that can permanently damage the surface and edges of a card, especially in warm storage.
The standard assembly sequence most collectors and shops follow:
- Penny sleeve or perfect-fit sleeve directly on the card
- Toploader or semi-rigid holder over the sleeved card
- Team bag (a resealable outer sleeve) over the toploader to stop dust and slipping
- Fitted box, binder page, or slab box as the outer container
Toploaders come in a few standard thicknesses, and picking the wrong one is a common rookie error. A 35pt toploader fits a single raw card with one or two thin sleeves. Once you start double-sleeving, or you’re housing a thicker card like a jersey patch or a card with foil layering, move up to a 55pt or heavier gauge so you’re not forcing plastic against plastic. Forcing a card into an undersized toploader is one of the fastest ways to crease a corner during insertion.
For cards you plan to submit for grading, skip the toploader for that step entirely. Graders want a penny sleeve inside a semi-rigid Card Saver, a thinner, flexible plastic sleeve that fits inside grading company submission packaging without the bulk of a rigid toploader. Submitting a card inside a toploader is one of the more common rejection reasons at intake, since it doesn’t fit the standard scanning and handling equipment graders use.
An archival-grade option worth knowing about is the Ultra PRO CardPreserver, an acid-free polypropylene holder with a soft front and rigid back that combines easier loading with a resealable back edge. It’s a useful middle step between a basic toploader and a full magnetic holder for cards you want easy access to without constant re-sleeving.
Pro Tip: Slide cards into a sleeve or toploader at a slight angle, corner first, rather than pushing them straight in edge-first. It reduces friction against the plastic opening and cuts down on the tiny white creases that show up along a top edge after repeated handling.
A few habits separate collectors who keep cards mint for a decade from collectors who don’t. Change penny sleeves that have gone cloudy or brittle. Never reuse a sleeve that already housed a different card, since dust and oils transfer. And resist the urge to double up on toploaders “for extra protection.” Two rigid holders stacked together just adds pressure and makes a card more likely to shift and scuff against a harder edge.
What’s the Best Way to Store a Full Collection?
Individual card protection only solves half the problem. The other half is what holds dozens, hundreds, or thousands of protected cards without crushing, exposing, or disorganizing them. Three formats cover almost every collector’s needs, and the right pick depends on whether you’re building for display, bulk storage, or slabbed grail cards.
1. Zippered side-loading binders. These work best for actively browsed sets, player collections, or anything you like flipping through at a card show table. Check three things before buying one: the inner pages should be PVC-free polypropylene, the zipper should run the full perimeter rather than a partial track, and the page capacity should match your set size so you’re not overstuffing. A side-loading design (cards slide in from the side, not top) keeps gravity from working cards loose over time the way top-loading pages sometimes do. There’s a real climate benefit here too: a zippered binder creates a small sealed microclimate around the cards inside, which slows how fast humidity swings from a nearby shower or kitchen reach the pages.
2. Fitted toploader boxes. These are the workhorse for bulk raw-card storage. Buy them sized to your sleeve thickness, not just the card size. A box built for bare cards will leave sleeved and toploaded cards loose enough to slide and shift with every move. If most of your collection sits in 35pt toploaders, buy toploader-specific boxes. If you’re storing thicker cards or double sleeves, size up.
3. Slab boxes. Once a card is graded and encased, it needs a box built for that footprint, not a generic card box. Graded slabs are taller, heavier, and shaped differently than raw cards, and a slab box keeps them upright and snug so they don’t slide and knock against each other during a move or a shelf bump.
Display cases and magnetic holders look great on a shelf, but almost none of them offer meaningful UV protection over the long run. Standard acrylic yellows and can even accelerate fading in cards under direct or indirect sunlight over a period of years. If a card matters enough to display, keep it out of direct sun and treat the display case as decoration, not the primary line of defense.
Whatever storage format you land on, labeling and packing habits matter more than people assume. Use dividers by set, year, or player so you’re not thumbing through a full box to find one card. Pack boxes upright and snug, never on their side and never so loose that cards can tip and lean, since sustained pressure at an angle is one of the quieter causes of long-term warping.
What Temperature and Humidity Keep Cards From Warping?
Temperature and humidity do more damage over a decade than bad sleeves ever will, because the effects are slow, invisible, and often irreversible by the time you notice them. The target range is 65°F to 75°F with 40% to 55% relative humidity. Cards stored consistently outside that band start to show problems that no amount of sleeve upgrading can fix afterward.
High humidity is the more destructive direction. Cardboard stock absorbs ambient moisture, and once relative humidity climbs, the card’s layers expand at different rates, which is why you see warping and foil curl on chrome and refractor cards first. Mold risk rises sharply above 60% relative humidity, and mold on a card is close to a death sentence for its condition grade. Low humidity has its own failure mode: cards stored too dry become brittle, and edges that would normally flex a little under light pressure instead crack.
A simple monitoring routine catches problems before they show up on the cards themselves:
- Place a hygrometer directly inside or next to your main storage container, not just somewhere in the room
- Take a baseline reading for a full week before assuming your storage spot is stable
- If you store cards in more than one location (closet, basement, garage), use a separate sensor in each, since readings can differ by 10 to 15 points between rooms
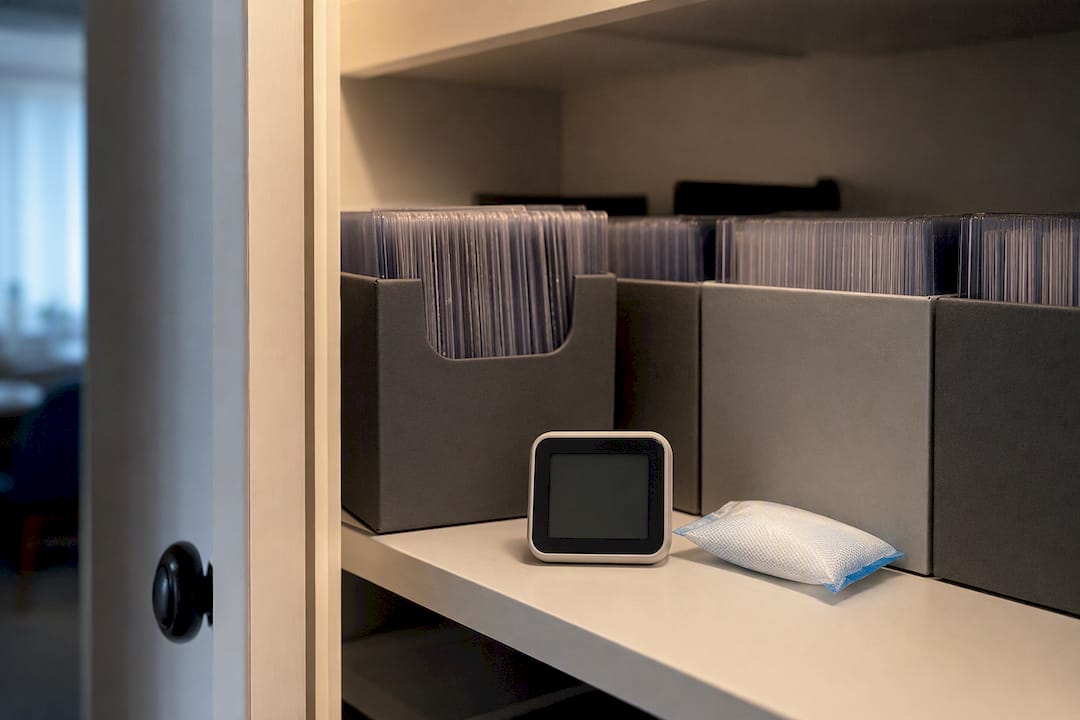
A basic hygrometer runs around $10, and it’s the single best dollar-for-dollar purchase a collector can make before spending another cent on holders. You genuinely cannot manage what you can’t measure, and most people who lose cards to warping or mold never had a device telling them their storage spot was a problem until it was too late.
Mitigation is usually cheap once you know there’s an issue. Silica gel packets inside a sealed storage box absorb excess moisture in humid climates. A small dehumidifier handles a whole closet or room if the problem is broader than one box. In dry climates, a humidifier or even a shallow water tray nearby can nudge levels back up. The cheapest fix of all is often just relocation: move storage out of a garage or attic, where temperature and humidity swing hardest with the seasons, and into an interior closet or a climate-controlled bedroom shelf, where the house’s own heating and cooling keeps things stable without you doing anything extra.
How Much Should You Spend Protecting Each Card?
Not every card deserves the same protection budget, and pretending otherwise wastes money on commons while leaving your best cards under-protected. A workable rule many collectors use is spending roughly 1% to 5% of a card’s value on its protection, scaled up as the card’s value climbs.
Under $10 (commons, base rookies, bulk lot cards): A penny sleeve is enough. Store these in a binder or bulk box. Spending more here doesn’t move the needle on anything, since resale value at this tier rarely justifies even a basic toploader.
$10 to $50 (mid-tier rookies, popular inserts, lower-pop parallels): Move to a perfect-fit sleeve plus a standard 35pt or 55pt toploader, stored in a fitted box or binder page. This is the tier where most collectors get lazy and skip the rigid holder entirely. Then wonder why a corner got dinged in a box move.
$50 to $200 (chase inserts, star rookies, low-numbered parallels): Double-sleeve (perfect-fit inside the toploader) and consider a semi-rigid Card Saver if you’re keeping options open for future grading. This tier is where an $8 mistake in packing or storage can cost you real resale dollars.
$200 to $500 (near-mint rookies of established stars, hot chase cards): Grading starts making financial sense here, especially if the card is genuinely near-mint and the population report shows real price separation between grades. Not every card at this tier is worth grading. If a card already has visible corner wear or a soft edge, grading fees are money spent to confirm a grade you already know isn’t great.
$500 and up (grails, vintage stars, elite rookie parallels): Grade it, full stop, assuming condition supports a strong grade. Store the slab in a dedicated slab box, away from direct light, in your most climate-stable location. At this tier, the cost of grading and archival storage is a rounding error against the card’s value.
The ROI logic on grading really comes down to whether the grade spread in that specific card’s market justifies the fee and turnaround time, and that varies a lot by sport, set, and even by the specific player. A raw PSA 9 candidate in a hot rookie class can double or triple in value once graded; the same card in a cold market might not clear the grading fee. Pokémon collectors face a similar calculation with chase holos and alt-art cards, where the gap between raw and graded value swings hard depending on the set’s current demand.

What Do Grading Companies Actually Require Before Submission?
Grading rejections almost always trace back to a packaging mistake, not a condition issue, and most of them are avoidable if you follow the format graders actually ask for.
1. Sleeve it correctly. Use a plain penny sleeve, then slide that sleeved card into a semi-rigid Card Saver. Do not submit inside a toploader, a screwdown holder, or a magnetic holder. Grading companies build their intake and scanning process around the semi-rigid format, and submissions outside that format get flagged and sometimes returned before grading even starts.
2. Handle by the edges only. Fingerprints and oil transfer are permanent once they’re on the surface of a card, especially older or matte-finish stock. For vintage cards, gloves are worth the minor hassle, since decades-old cardboard stock is more porous and prone to surface transfer than modern chrome stock.
3. Fill out submission paperwork precisely. Card name, set, year, and declared value need to match what’s actually in the sleeve. Mismatches slow down processing and occasionally trigger a manual review that adds weeks to your turnaround.
4. Pack and ship insured and tracked. Never submit a high-value card without both. A grading company’s intake process can take weeks, and an uninsured, untracked envelope is a real risk during that window.
The most common mistakes are almost comically avoidable once you know them: taping a sleeve shut (tape residue can permanently mark a card and will tank a grade), stuffing a card into a magnetic holder before submission, and forcing a card into a sleeve that’s slightly too tight, which creases a corner in seconds and can’t be undone.
Pro Tip: Never write directly on a penny sleeve with a pen for identification. Ink can bleed through thin plastic under pressure or heat during shipping. Use a small sticky label on the outside toploader or team bag instead.
How Do You Ship Cards Without Damaging Them?
Shipping is where a lot of well-protected cards get ruined in transit, usually from a packaging shortcut that saved five minutes and cost the card’s corner.
For raw cards, the standard sequence is: sleeve, then toploader, then a resealable outer bag over the toploader, then a cardboard sandwich (two pieces of cardboard taped around the toploader, not touching the card itself), then a bubble mailer or rigid envelope. Skipping the cardboard sandwich is the single most common shortcut that leads to a bent card, since a bubble mailer alone flexes enough in transit to crease a toploader’s corner right through to the card inside.
For graded slabs, wrap the slab in a resealable bag first, then bubble wrap, then pack it into a small rigid box with minimal internal movement. A loose slab rattling inside an oversized box is how corners of the plastic case crack, which can devalue even a perfectly graded card.
A few packing habits matter regardless of what’s inside the box:
- Add signature confirmation and insurance for anything over roughly $200 in declared value
- Choose a tracked carrier service every time, even for lower-value shipments, since proof of delivery protects both buyer and seller in a dispute
- Write the recipient’s address clearly and double check it against the order or listing details before sealing the package, since address errors cause a disproportionate share of lost-package claims
For carrying cards to a show rather than shipping them, a rigid slab box or toploader box in a padded bag beats a loose stack in a binder every time. Cards riding in a car trunk on a hot day face the same humidity and heat risk as poor home storage, just compressed into a shorter window.
How Can You Use Market Data to Decide What to Protect First?
Most collectors protect cards in the order they bought them, not the order their value actually justifies, and that’s backwards. A practical workflow fixes it: inventory everything you own, check current market value on each card, assign a protection tier based on that number, then act.
Start by scanning your cards to pull live values rather than relying on memory or a price guide from a few years ago. Card markets move fast, and a rookie card that was a $30 hold last year might be a $150 chase card today if the player broke out, or the reverse if hype cooled off. Ripbin’s scanning tool pulls current market value from actual sales data rather than list prices, which matters because list prices tend to run high and don’t reflect what cards are actually trading for.
Once you know a card’s real value, log it somewhere central instead of trusting memory. A collection locker style tool lets you track your full inventory in one place, which becomes the reference point every time you’re deciding whether a card has crossed a protection threshold, like moving from $40 to $60 and now justifying a toploader instead of just a sleeve.
Value guides broken down by player and set add another layer of context: they show you whether a card’s current price reflects a stable market or a temporary spike that might not hold. That distinction matters when you’re deciding whether to grade now or wait, since grading a card during an inflated price spike sometimes means paying fees on a value that cools off before the slab even comes back.
The last piece is re-evaluation. Card values shift with trades, injuries, rookie class hype, and set popularity, and a protection tier assigned a year ago might be outdated. Checking values periodically, especially around big market moments like a rookie’s breakout season or a set’s anniversary reprint, keeps your protection spending matched to what your cards are actually worth right now rather than what they were worth when you first sleeved them.
Why the Standard Storage Advice Sells Collectors Short
Most storage guides treat every card the same way: buy good sleeves, buy good boxes, done. That advice isn’t wrong, but it skips the harder question, which is how to allocate a limited protection budget across a collection where card values might range from $2 to $2,000. The value-tier approach in this guide exists because that gap is where real money gets lost, either through overspending on commons or underspending on a card that was quietly worth grading.
The bigger blind spot is timing. Collectors set up their storage once and rarely revisit it, even as card values move dramatically within a single season. A rookie card sitting in a penny sleeve because it was worth $8 at purchase can become a $150 card by midseason, and it’s still sitting in that same penny sleeve until someone checks. Treating protection as a one-time setup instead of an ongoing decision, tied to current market value rather than purchase price, is the single biggest gap between how people actually store cards and how they should.
Start with your highest-value cards, get their protection tier right this week, and build the habit of checking values before you assume a card’s current sleeve is still doing its job.
— Saad
Scan, Value, and Protect the Cards That Matter Most
Knowing a card’s real value is the missing step in most protection routines, and that’s the specific gap Ripbin closes. Scan a card and get a live value pulled from actual sales, not a stale price guide, then log it in your collection locker so every card in your storage has a current number attached to it.
A useful first move: scan your top 50 cards this week, sort them by current value, and match each one to a protection tier before you sleeve a single new pickup. Cards that jump a tier because of a hot streak or a new set release deserve a second look at their holder, not just a mental note. Browse current values on Ripbin to check where your key cards stand right now, or start tracking your full collection at Ripbin.
Sources
The environment targets and monitoring advice in this guide come from ProtecVault’s humidity and temperature research, which sets the 65°F to 75°F and 40% to 55% RH ranges used throughout. The value-tier spending framework draws on ProtecVault’s protection guide, which lays out the 1% to 5% spend rule. Grading submission requirements come from a dedicated storage and care guide covering shop-level packing workflows. Long-term storage format recommendations reference CollectorsPrice’s roundup of standard protection stacks, and vintage-specific handling guidance comes from DeckSentry’s archival storage guide for cards over 20 years old.
- The Complete Trading Card Protection Guide (2026) | ProtecVault
- Card Storage & Care Guide
- Best Sports Card Storage Pieces for Long-Term Collectors | CollectorsPrice